NsVp over the American and Canadian flagsMECP SKILLEDCERTIFIED INSTALLERSINCE 1995 · TALLAHASSEE, FL
← All builds
3D PrintingOct 2026In progress

3D-printed case for a 5-panel LED matrix banner
3D-printed case for a 5-panel LED matrix banner
Panels
5× Waveshare RGB matrix, P4 64×32
Display
320 × 32 pixels
Overall size
1288 × 135 × 75 mm
Printed parts
5 modules, no supports
Inside
5 V 30 A supply + Raspberry Pi with matrix HAT
Hardware
16 M3 heat-set inserts and screws
Mount
Keyholes on the back of every module
Printer
Kobra S1 Max

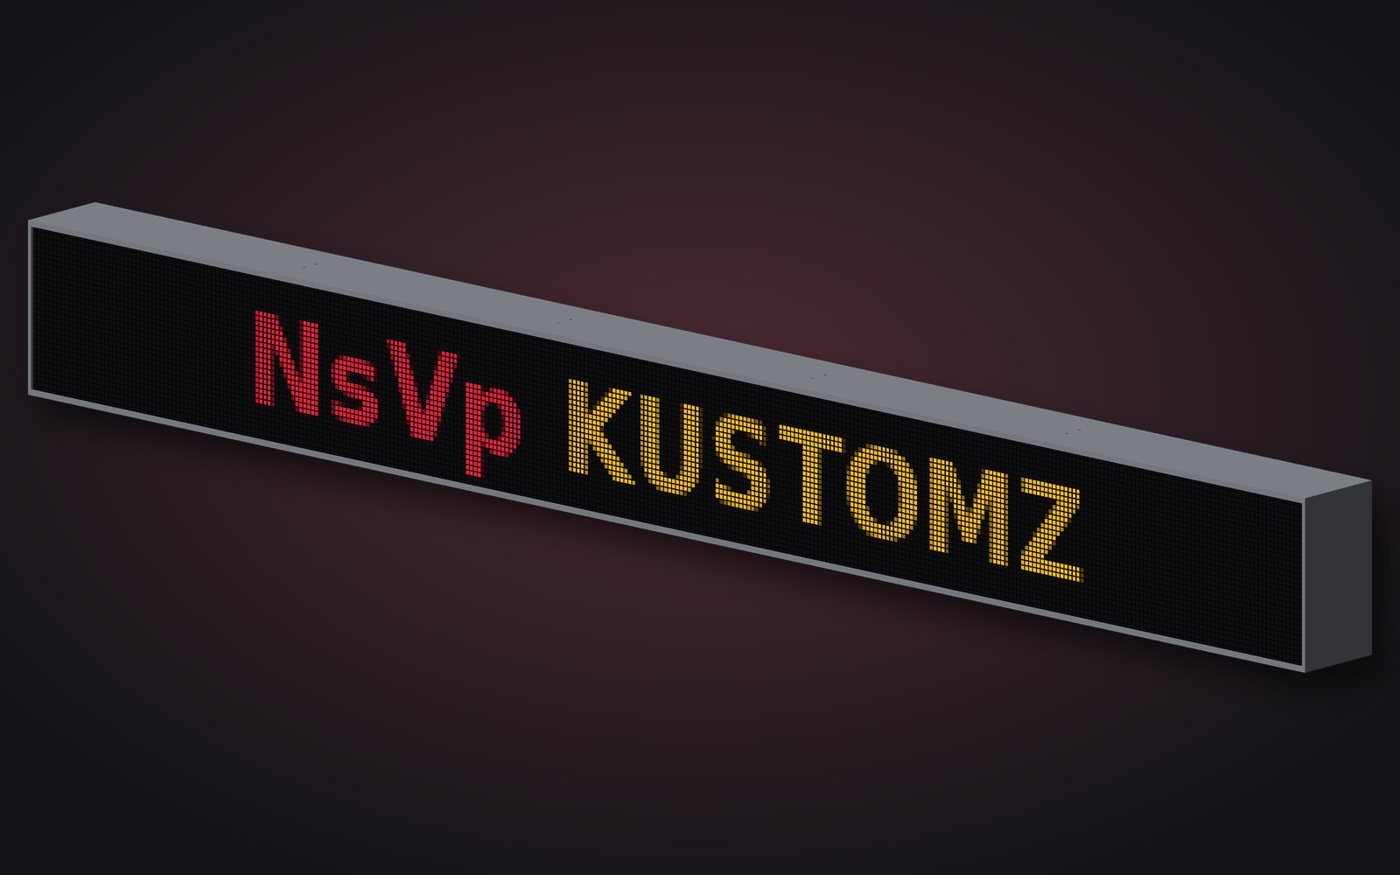
I wanted a scrolling LED sign, so I lined up five Waveshare 64×32 RGB panels into one long banner, 320 pixels wide and a little over four feet long. Loose panels and a pile of wiring don't hang on a wall very well, so I designed a case that holds all of it: the panels, the power supply, and the Raspberry Pi that runs it.

One module per panel

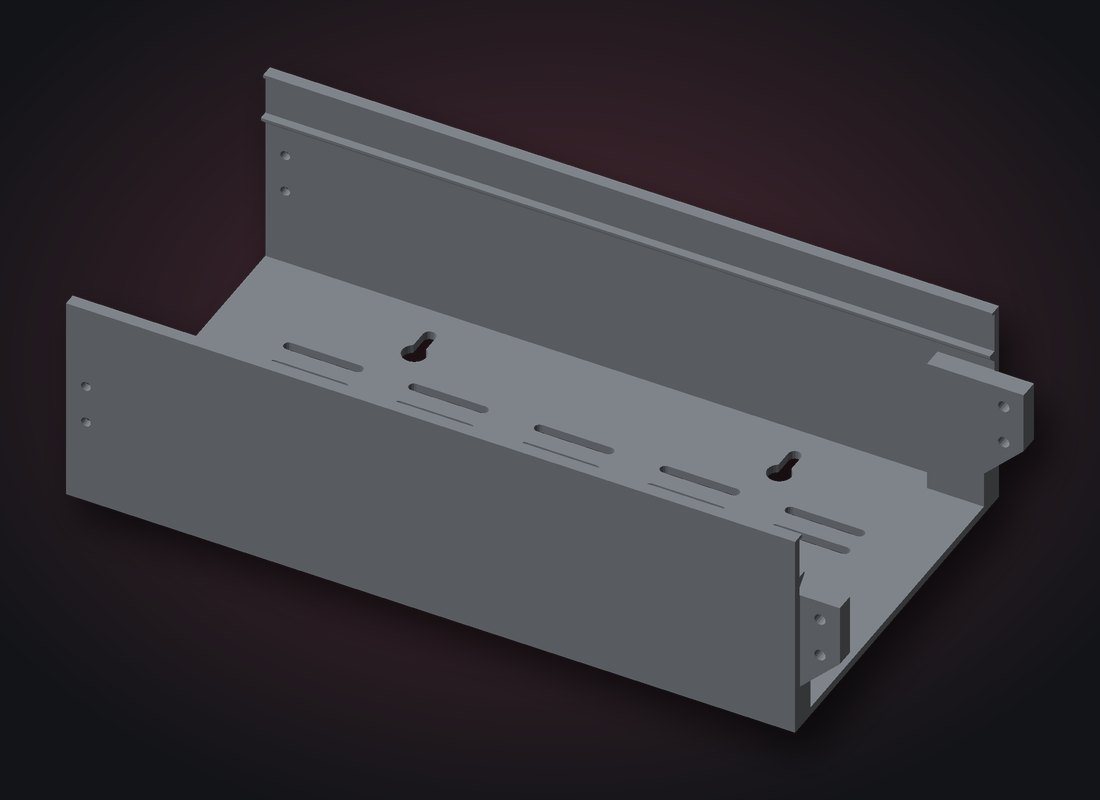
The first version was 19 separate parts: rails, back plates and end caps. I redesigned it so each panel gets one printed module, with the top and bottom walls, the front lip, the panel ledge and the back all in a single piece. That took it from 19 parts down to 5, and from 40 screws down to 16. Every module is about 270 mm long, so each one fits on the printer bed with room to spare.

How the panels go in

No screws touch the panels. The top and bottom walls of each module have a thin lip at the front and a ledge behind it, and the 14 mm thick panel slides in sideways between them. The lip only covers about a millimeter of the panel's edge, outside the LEDs, so nothing blocks the display. Once the modules are joined, the panels next to each other box each other in, and the end walls close off the two outside ones.

Joining the modules

Each module has two tongues sticking out of one end, top and bottom. They slide into the next module and get two M3 screws each, into heat-set inserts I melted into the tongues. Four joints, 16 screws, and the whole thing is one rigid banner.

What's inside

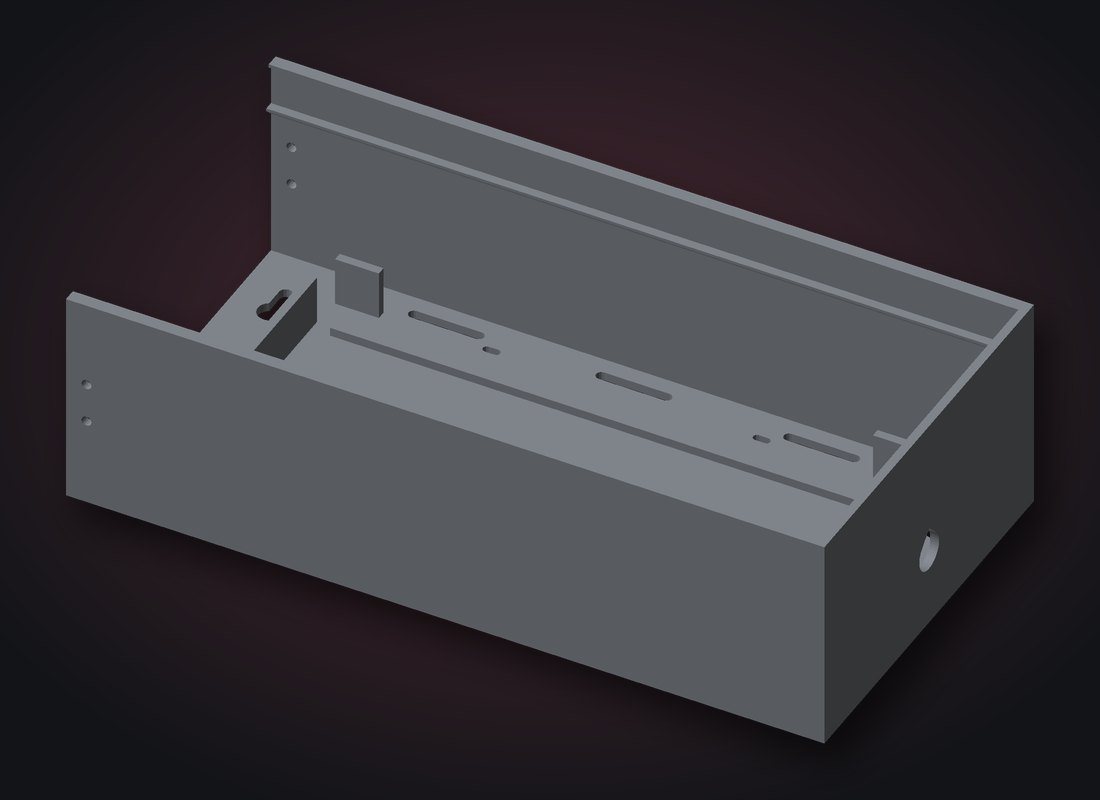
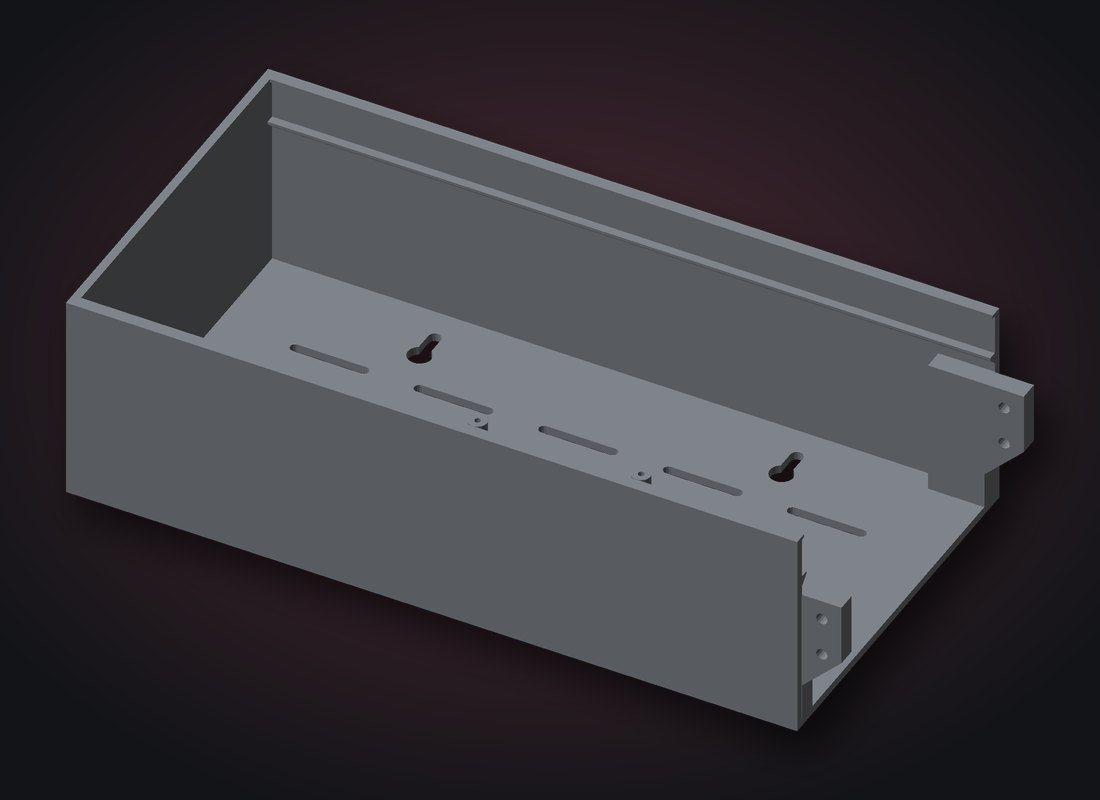
Facing the sign, the left end holds a 5 V 30 A power supply. Five panels can pull around 20 A at full white, so it needs the headroom. The supply sits on ribs a few millimeters off the back with vents beside it, strapped down with zip ties, and the mains cord comes in through a cable gland in the end wall. The right end has standoffs for the Raspberry Pi and RGB matrix HAT. The HUB75 ribbon runs from the HAT to the first panel and chains down the line, and every panel gets its own 5 V feed from the supply.

Printing it

All five modules print back-side down with the open front facing up, so nothing needs supports. The ledge has a 45° underside so it bridges cleanly. There's also a small fit-test piece of the slot, about a 10-minute print, to check that a panel slides in snug before committing to the big prints. Each module runs about 8 to 12 hours. Since a mains power supply lives inside, at least the power end should be PETG or ASA, not PLA.

Hanging it

Every module has two keyholes on the back, so I can use whichever ones line up with studs or anchors. Screw heads go through the round part of the keyhole and the banner slides down onto them.

The images here are 3D renders from the print files, and the message on the panels is a mock-up. The build is still in progress. Photos of the real thing on the wall and lit up are coming.
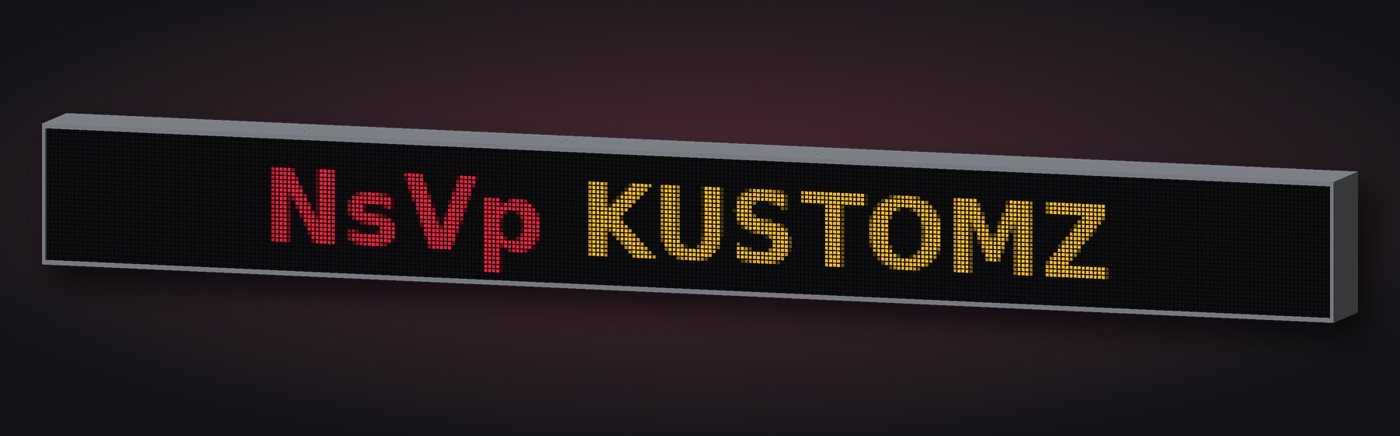
Front view of the 1.28 m LED banner case with NsVp Kustomz lit on the panels
All five modules joined into one 1288 mm banner. The lit message is a mock-up.
Middle module of the LED banner case, open side up
Middle module (print 3). Tongues on the end slide into the next module; keyholes and vents in the back.
Left end module with power supply cradle and cable gland hole
Left end module. The 5 V 30 A supply rides on ribs in here, and the mains cord comes in through a cable gland in the end wall.
Right end module with Raspberry Pi standoffs
Right end module. The Raspberry Pi and matrix HAT mount on standoffs behind the last panel.
Serving Tallahassee & surrounding areas

Services

Car audio, amps, custom sub boxes, window tint, and custom 3D-printed parts, done like I do my own builds: clean wiring, parts that actually fit, and no shortcuts.

Head unit installs

Aftermarket stereo installs with the right dash kit and wiring harness so it looks factory.

  • Dash kits & harnesses
  • Single & double DIN

Speaker upgrades

Speaker swaps, including custom-printed mounts and adapters for awkward factory locations.

  • Door & dash speakers
  • Custom mounts & pods

Amp installs

Amplifier installs with properly sized power and ground wire, fusing, and gains set right so it hits clean.

  • Mono & multi-channel amps
  • Wiring kits & fusing
  • Gain setup

Custom sub boxes

Sealed and ported subwoofer enclosures built for your subs and the space you have.

  • Sealed & ported
  • Built to fit your vehicle
  • Matched to your subs

Window tint

Window tint for cars and trucks. Ask about shade options and Florida's legal limits.

  • Cars, trucks & SUVs
  • Multiple shade options

Custom 3D printing

Replacement trim, grilles, brackets, and cases designed to fit. Multi-color prints available.

  • Auto interior parts
  • Cases & holders
  • Custom gifts & decor

Request a quote

Tell me what you're driving and what you want done, or what you need printed. I'll get back to you with a price and timing. Prefer to talk? Call or text (850) 224-2635, Mon–Fri 9–6.

For prints, a photo or measurements of the original part helps a lot.

Your info is only used to reply to your request. It's never sold or shared.

Where the work happens

Visit Stereo Sales

All installs, tint, and custom work are done at Stereo Sales, Tallahassee's car audio shop since 1966.

Address
700 N Monroe St
Tallahassee, FL 32303
Call or text
(850) 224-2635
Hours
Mon–Fri: 9 AM – 6 PM
Sat–Sun: Closed

About the shop

MECP SKILLEDCERTIFIED INSTALLERSINCE 1995 · TALLAHASSEE, FL

I'm Paul, a MECP Skilled certified installer and the shop manager at Stereo Sales in Tallahassee, Florida, and I've been in car audio since 1995. NsVp Kustomz is where I post what I'm working on: installs, custom boxes, parts I design and 3D print, sports cards, and more. Expect build notes, part numbers, what worked, and what I'd do differently next time.

More about me →

  • Anycubic Kobra S1 Max
  • ACE 2 Pro multi-color
  • 0.6 mm nozzle